
In Mastering Drupal Multilingual: Part 1 of 3, we focused on planning for Drupal multilingual and its impact on a project's timeline and budget.
In Part 2 (below), we cover everything you need to know to have a functioning multilingual site with no custom code. Part 3 of the series covers more advanced techniques for site builders and front-end developers.
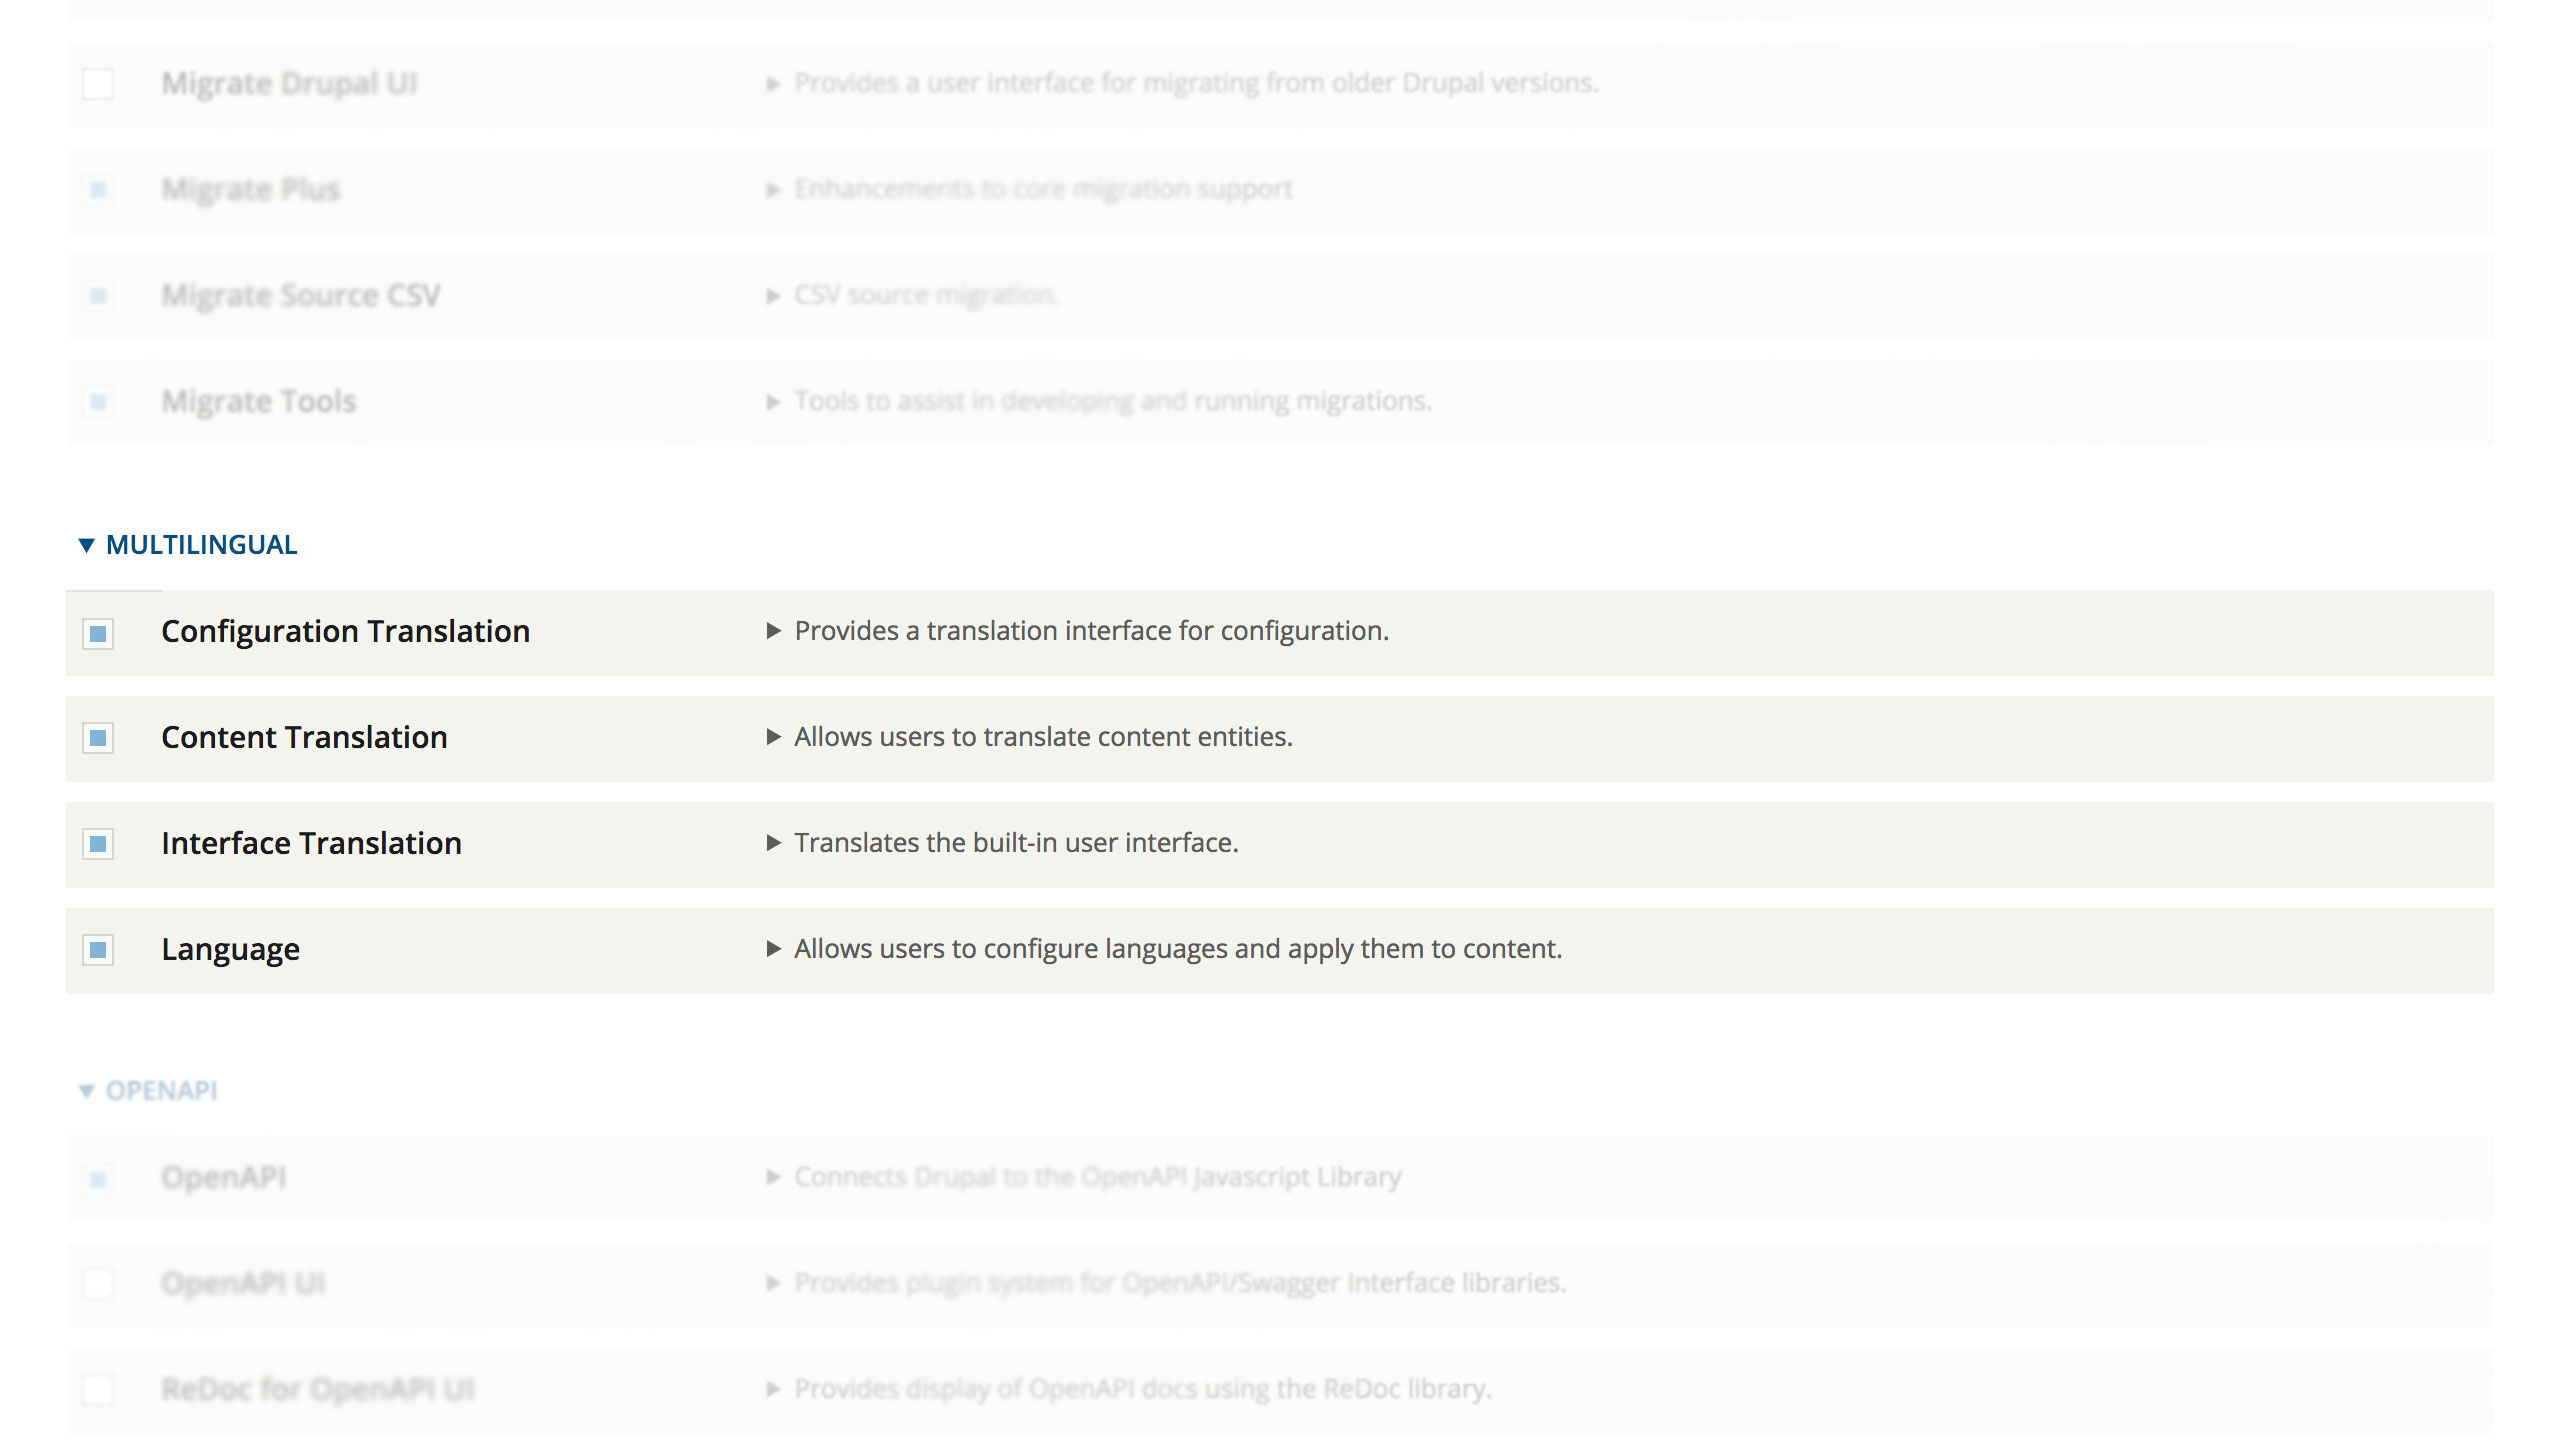
All of the modules needed for a Drupal 8 multilingual site are core modules, included in every Drupal 8 install by default! Simply login as a site administrator, browse to the Extend page, check the Multilingual boxes and click install (or install via the command line).
The four modules you'll need:
- Language—enables additional languages to be added to the site.
- Content Translation—allows entities and their fields to be translatable.
- Configuration Translation—provides translation functionality for configuration items like field labels and views.
- Interface Translation—adds a UI for translating custom Twig and module text strings and the administration interface.
Drupal already comes with 100 languages to choose from, and you can also add custom languages. This means that you can translate content into any language you can think of with no limitations.
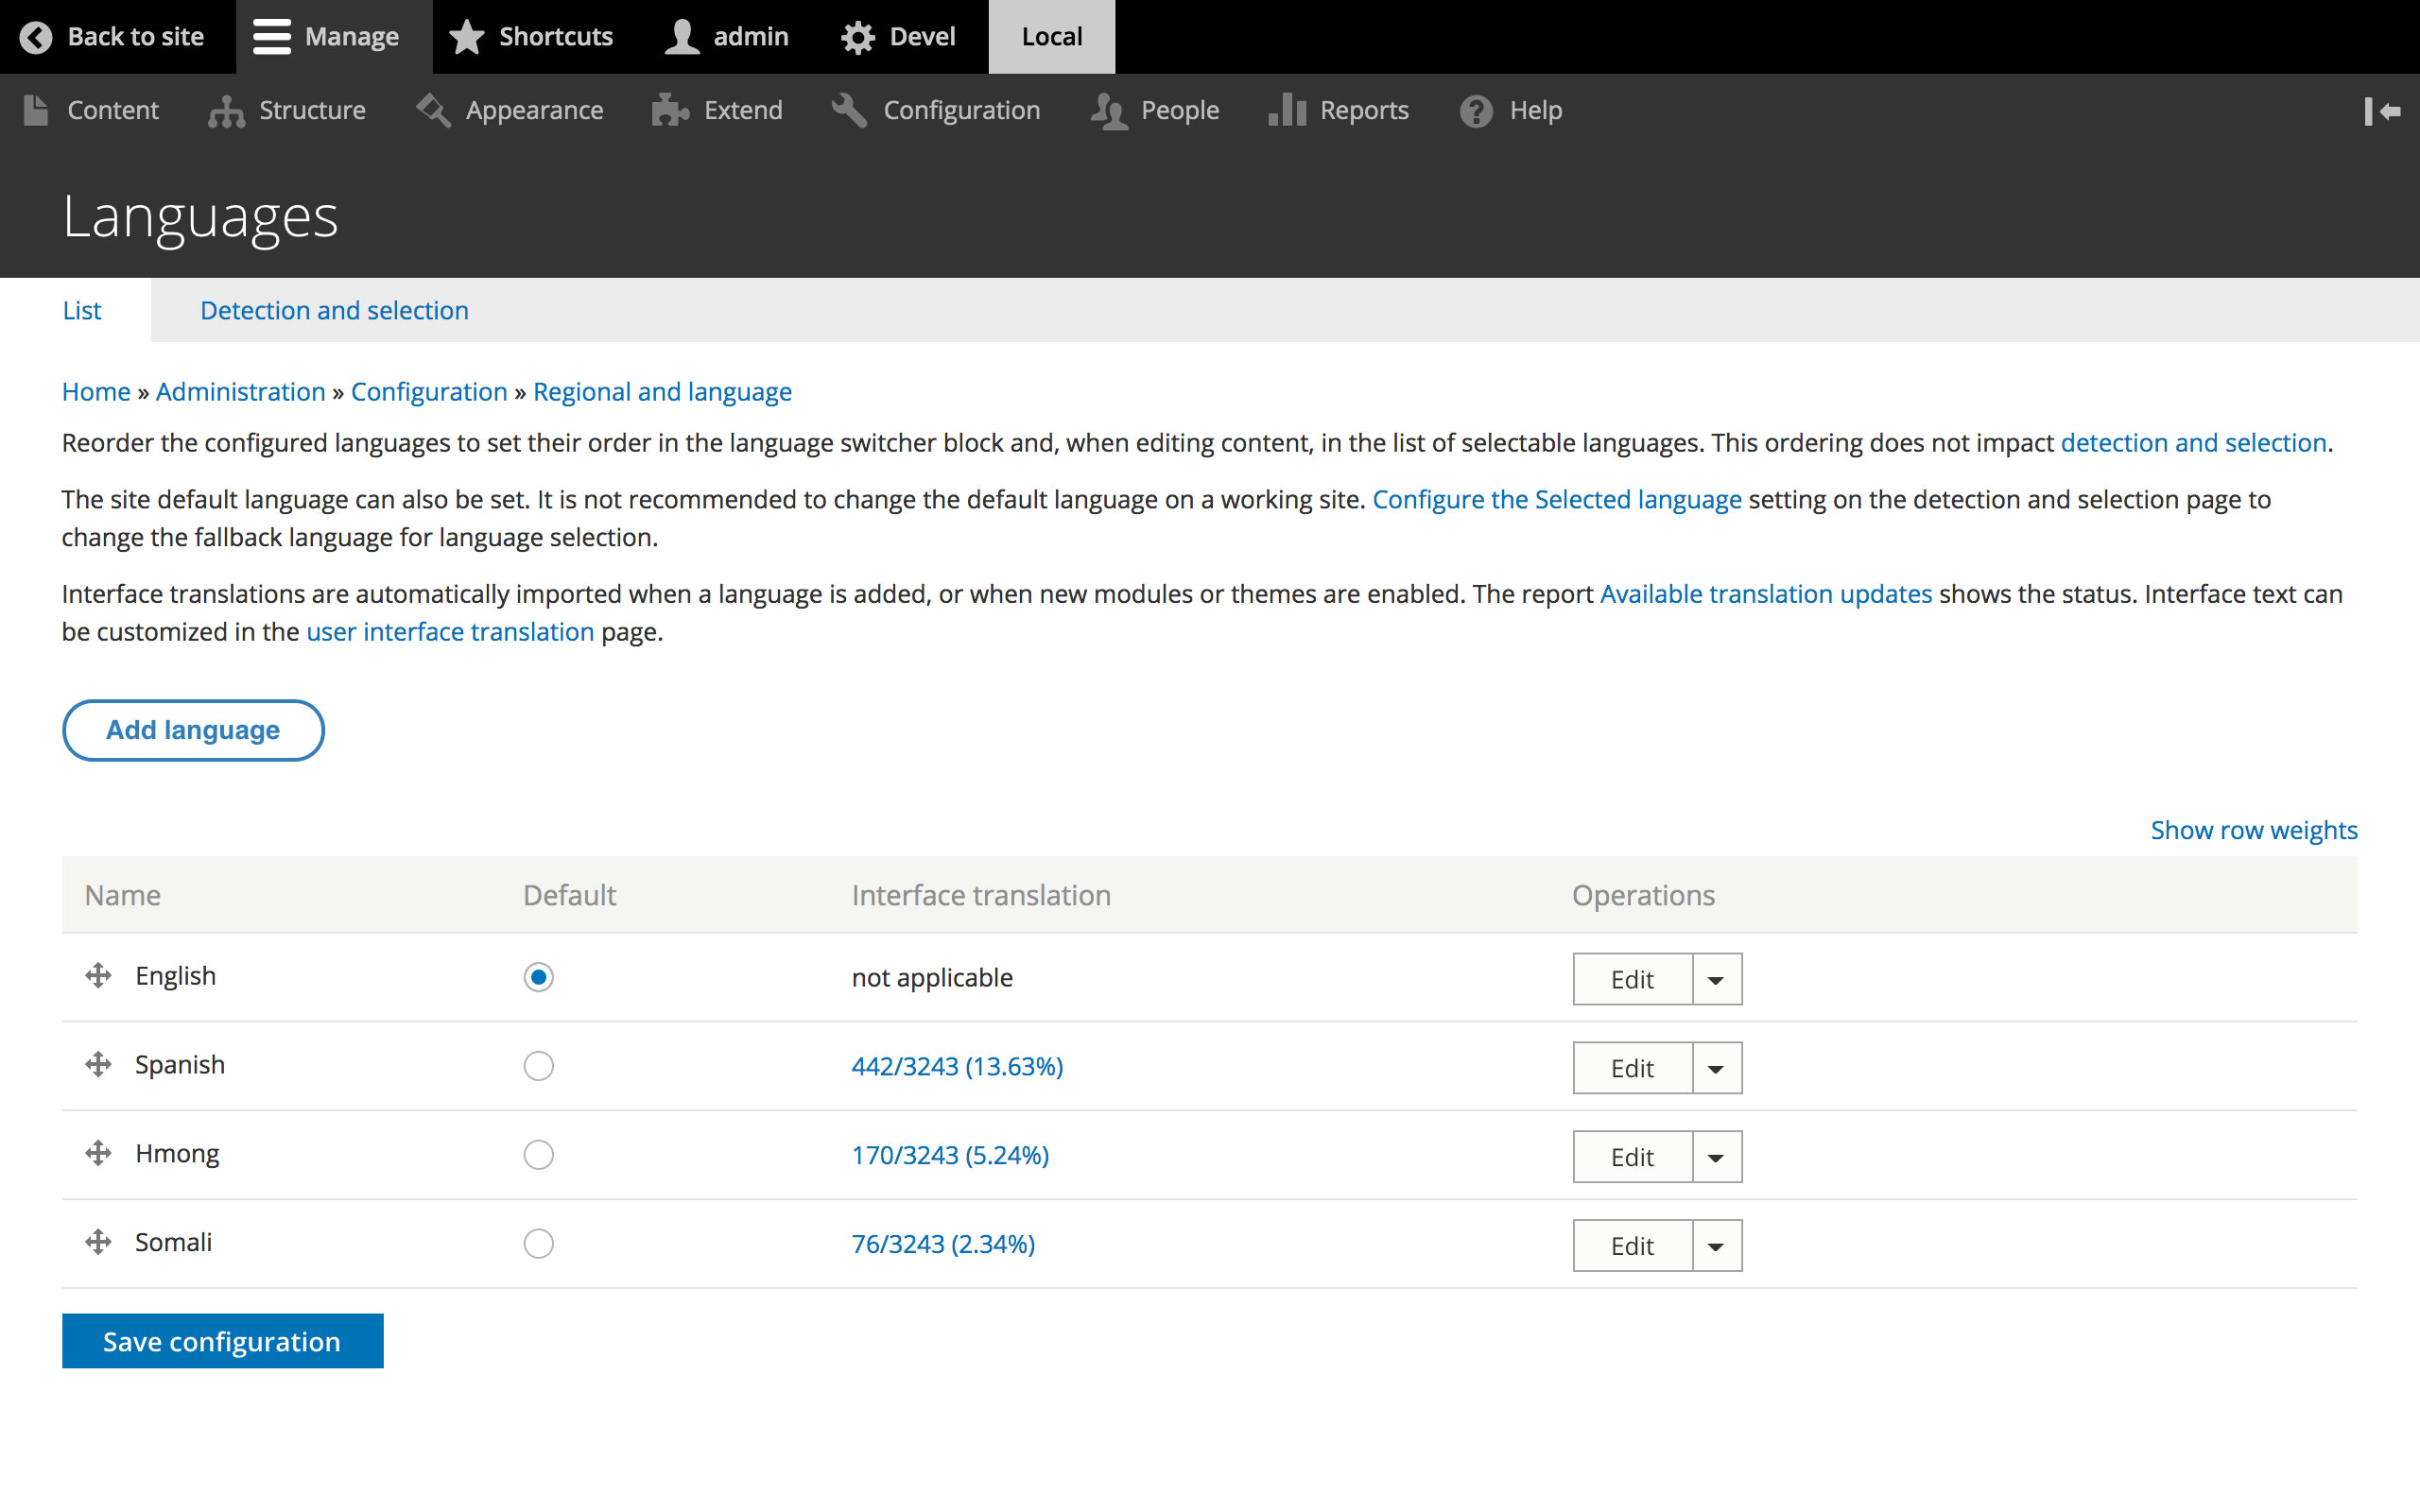
To add a language, go to Configuration > Languages and click Add Language. If you choose one of the default languages from the select list, Drupal will automatically fetch the most up-to-date interface translation files. These interface translation files automatically provide translations for a large part of the administration interface when viewed in that language.
Note: You will often see errors or PHP warnings when installing default languages. This is due to the difficulty of keeping 100 languages updated with all the changes between Drupal versions and compatibility with the vast sphere of contributed modules. Do not worry, the language will still work perfectly for content, configuration, and custom string translations.
If you choose to add a custom language (at the very bottom of the language list) you will be prompted to choose a language code and language name as well as the language direction you wish to use. It is very important that you use an approved language code. Approved language codes can be found in the Commerce Guys Address repository.
Using approved language codes will prevent fatal errors with Views and other possible bugs. The list of approved codes may not contain the specific code you want to use for the language prefix—often seen in the URL when viewing the site in a different language–but the prefixes can customized to display whatever you want to the end-user.
Once you add a language to the site, the Drupal language switcher block will become available to your list of blocks. Place this via block layout (or your own preferred method) to allow users to change the site language. The page header is a typical location.
After you've added all of the languages you need for the site, click on the 'Detect and selection tab' in the languages interface. The settings here will let Drupal know how to tell which language to display. Each method has pros and cons, depending on your site and user base. We prefer the URL method. Using this method will add the language prefix of the user-selected language to the URL and will keep the site in that language until a different language is selected or the prefix is manually removed from the URL.
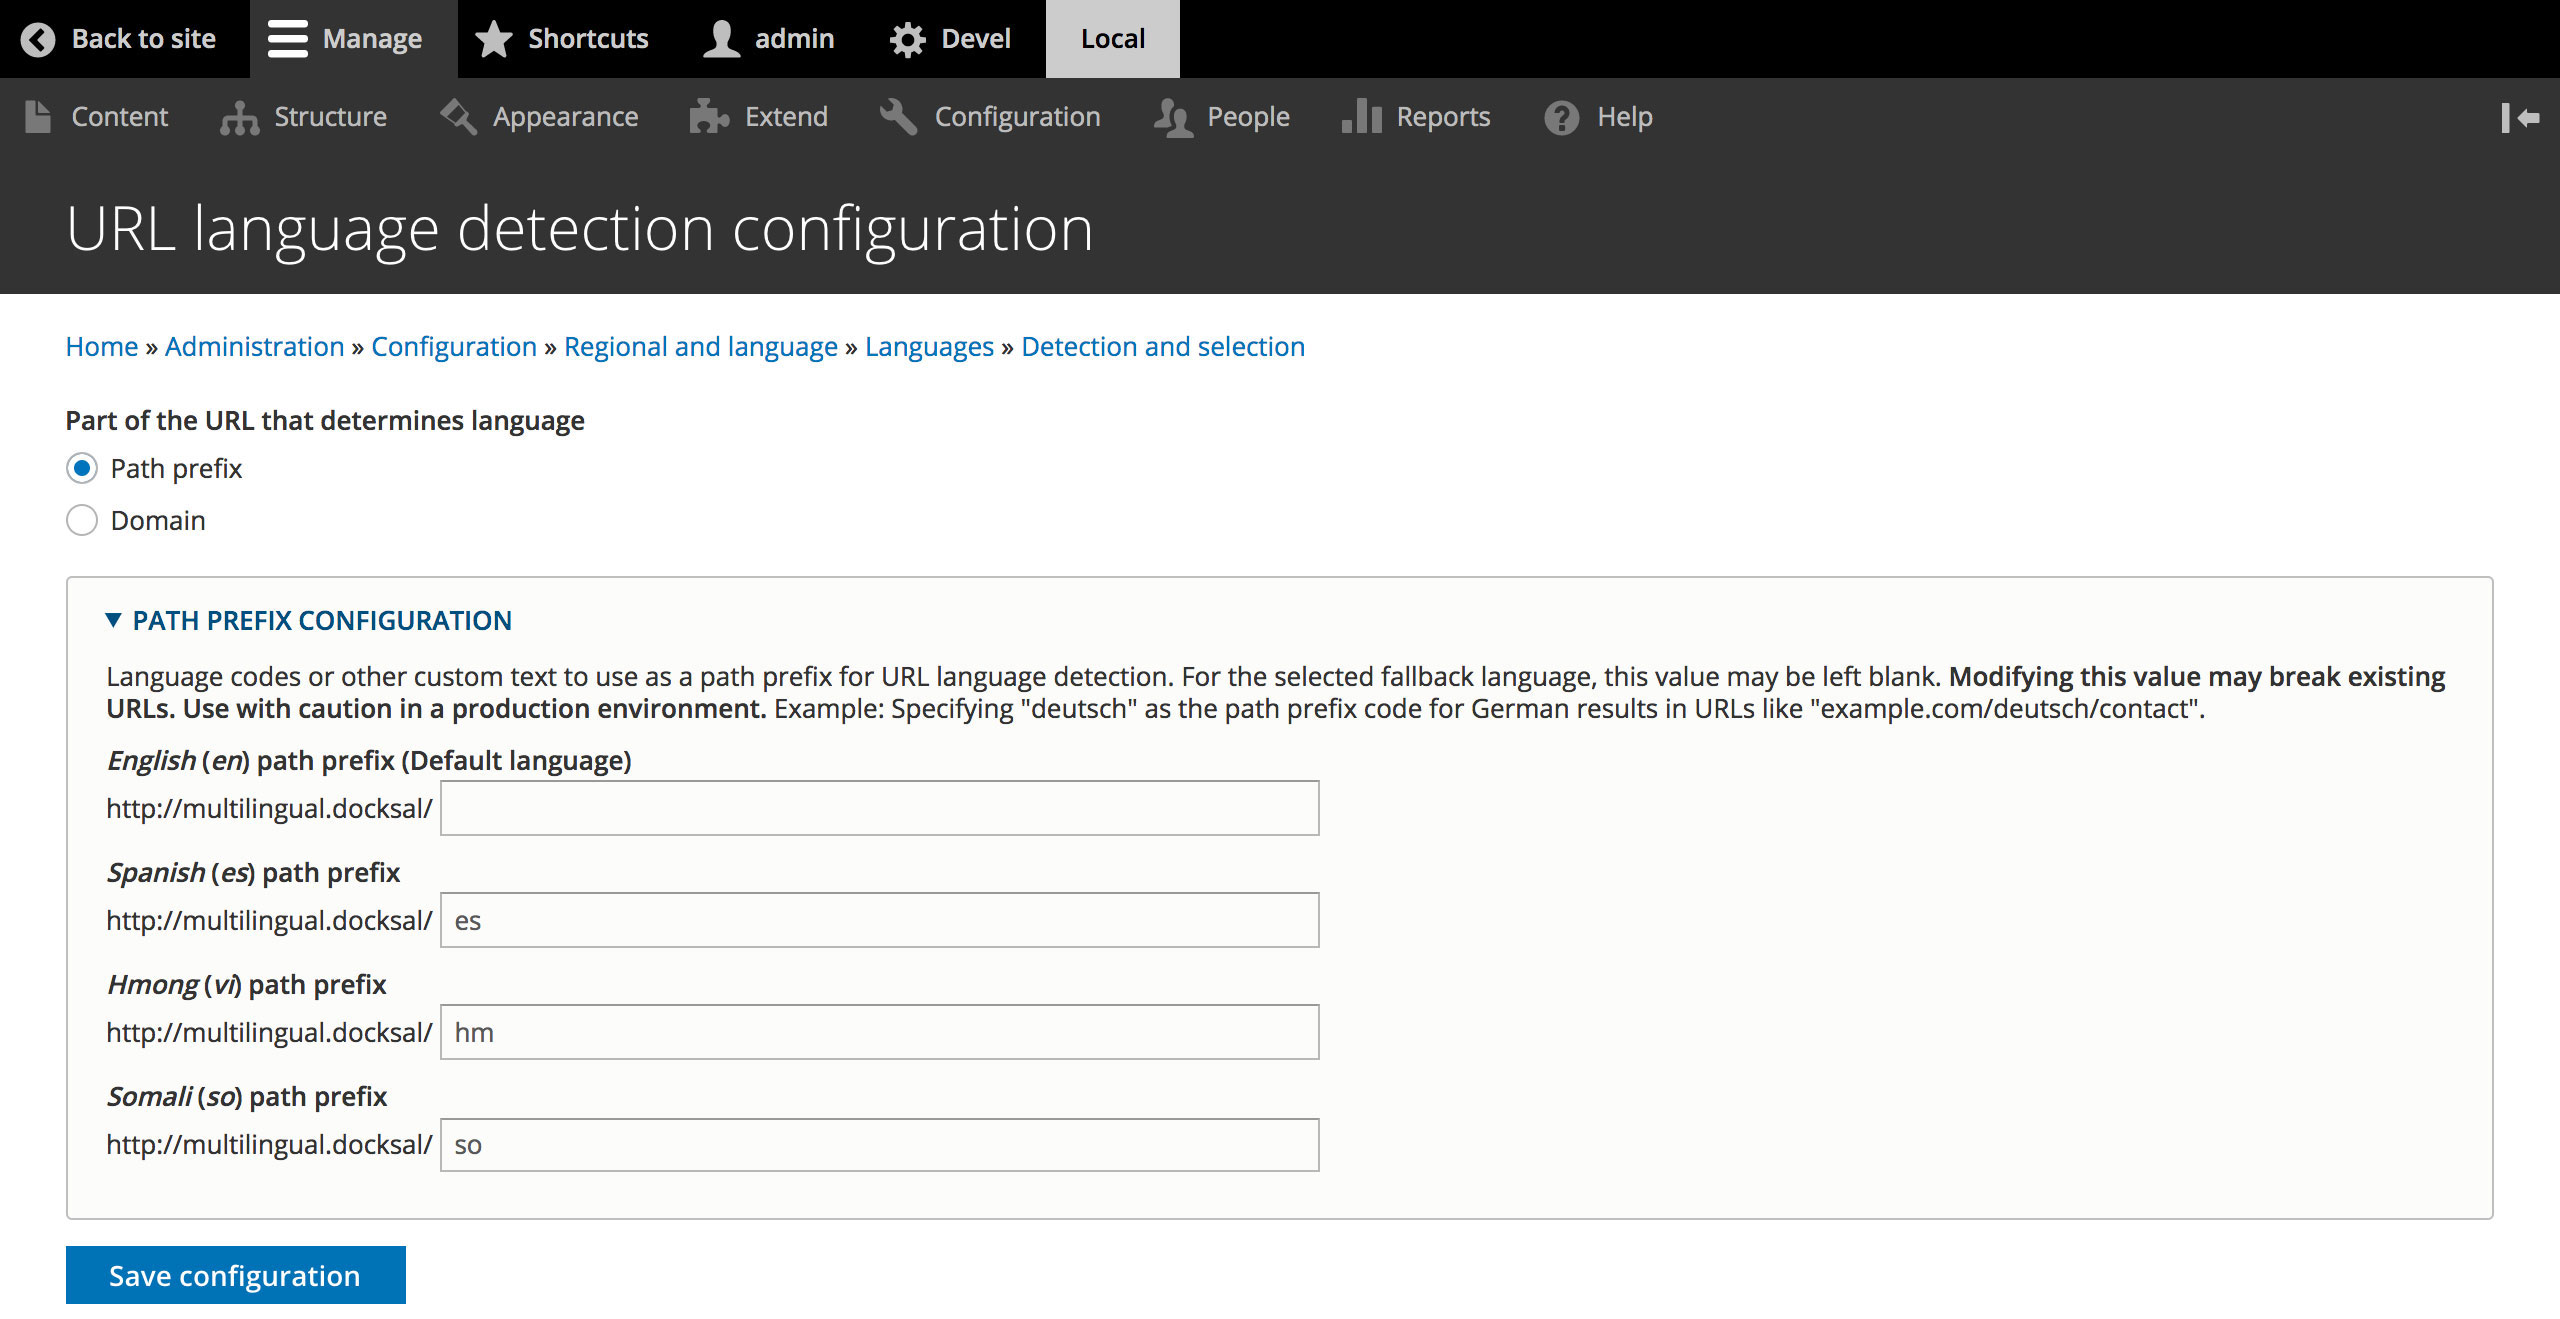
Configuring the URL method will allow you to choose the prefix you wish to use for each installed language. Using a custom prefix along with the language name you set means that you can use approved codes (as mentioned above) without being culturally insensitive to your users.
For example, on a recent project requiring Hmong translations, we did not have a pre-existing prefix. On the backend, we used the pre-existing Vietnamese prefix but rewrote it to display "hm" instead of "vi" (recognizing that these are two different languages).
Language names can also be translated in the Languages interface.
Now that the languages have been installed on the site, its time to look at the different types of translations. Drupal multilingual sites have three types of translations:
- Content Translation
- Configuration Translation
- Interface Translation
As you may suspect, each translation type governs a major area of the site. Content translation allows editors to add content in each language, but the content entities which will allow translation must be enabled by site builders. Configuration translation is translation done by site builders for things like field labels, views, and webforms. Interface translation covers the admin interface and custom Twig/PHP strings that have been coded as translatable by developers.
Every content entity in Drupal can be translated, but each one has to have translation enabled by a site builder. Thankfully, all entities can be enabled from one screen. Go to Configuration > Content Language and Translation (note that this page may take a long time to load depending on the size of your site) and select the entity types you wish to be translatable.
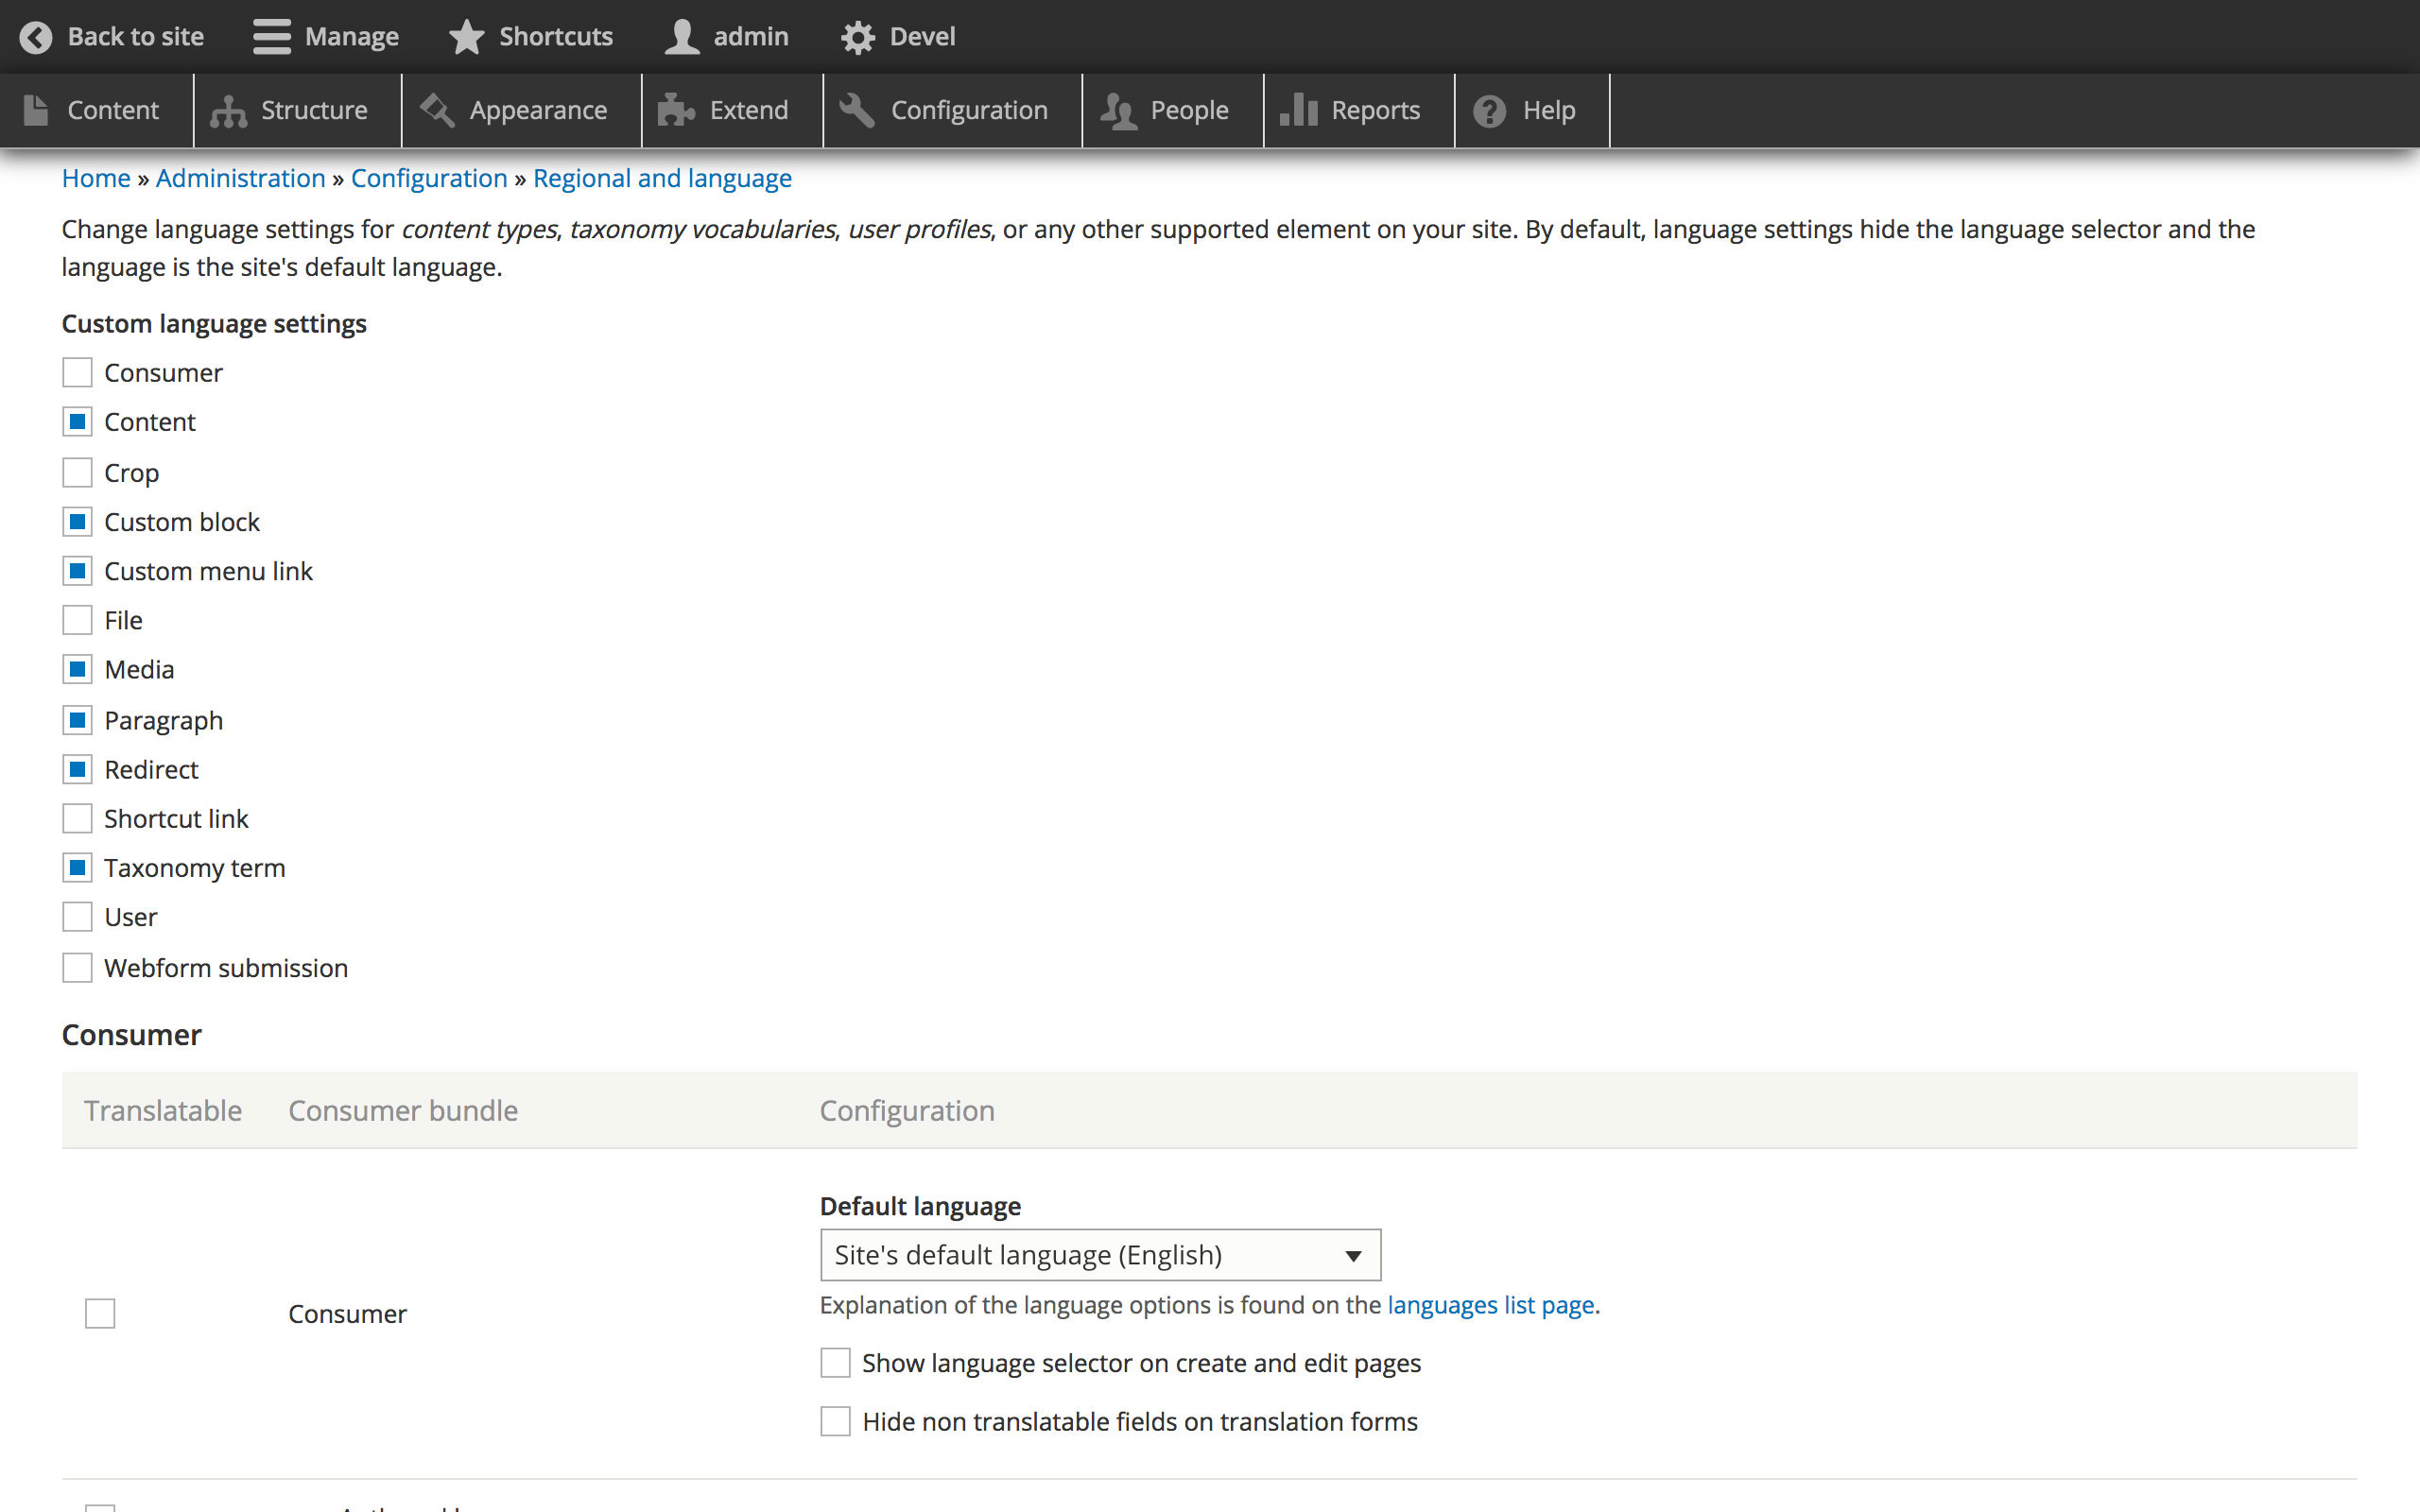
If your site uses the Paragraphs module, it is a common misconception that Paragraphs cannot be translated. Enabling translation for the Paragraphs entity will even show a handy warning that says: "(* unsupported) Paragraphs fields do not support translation. See the online documentation." This warning is true—although misleading. The Paragraphs field on a content type (for example) cannot be translated, but the fields on the Paragraphs bundles themselves can be translated.
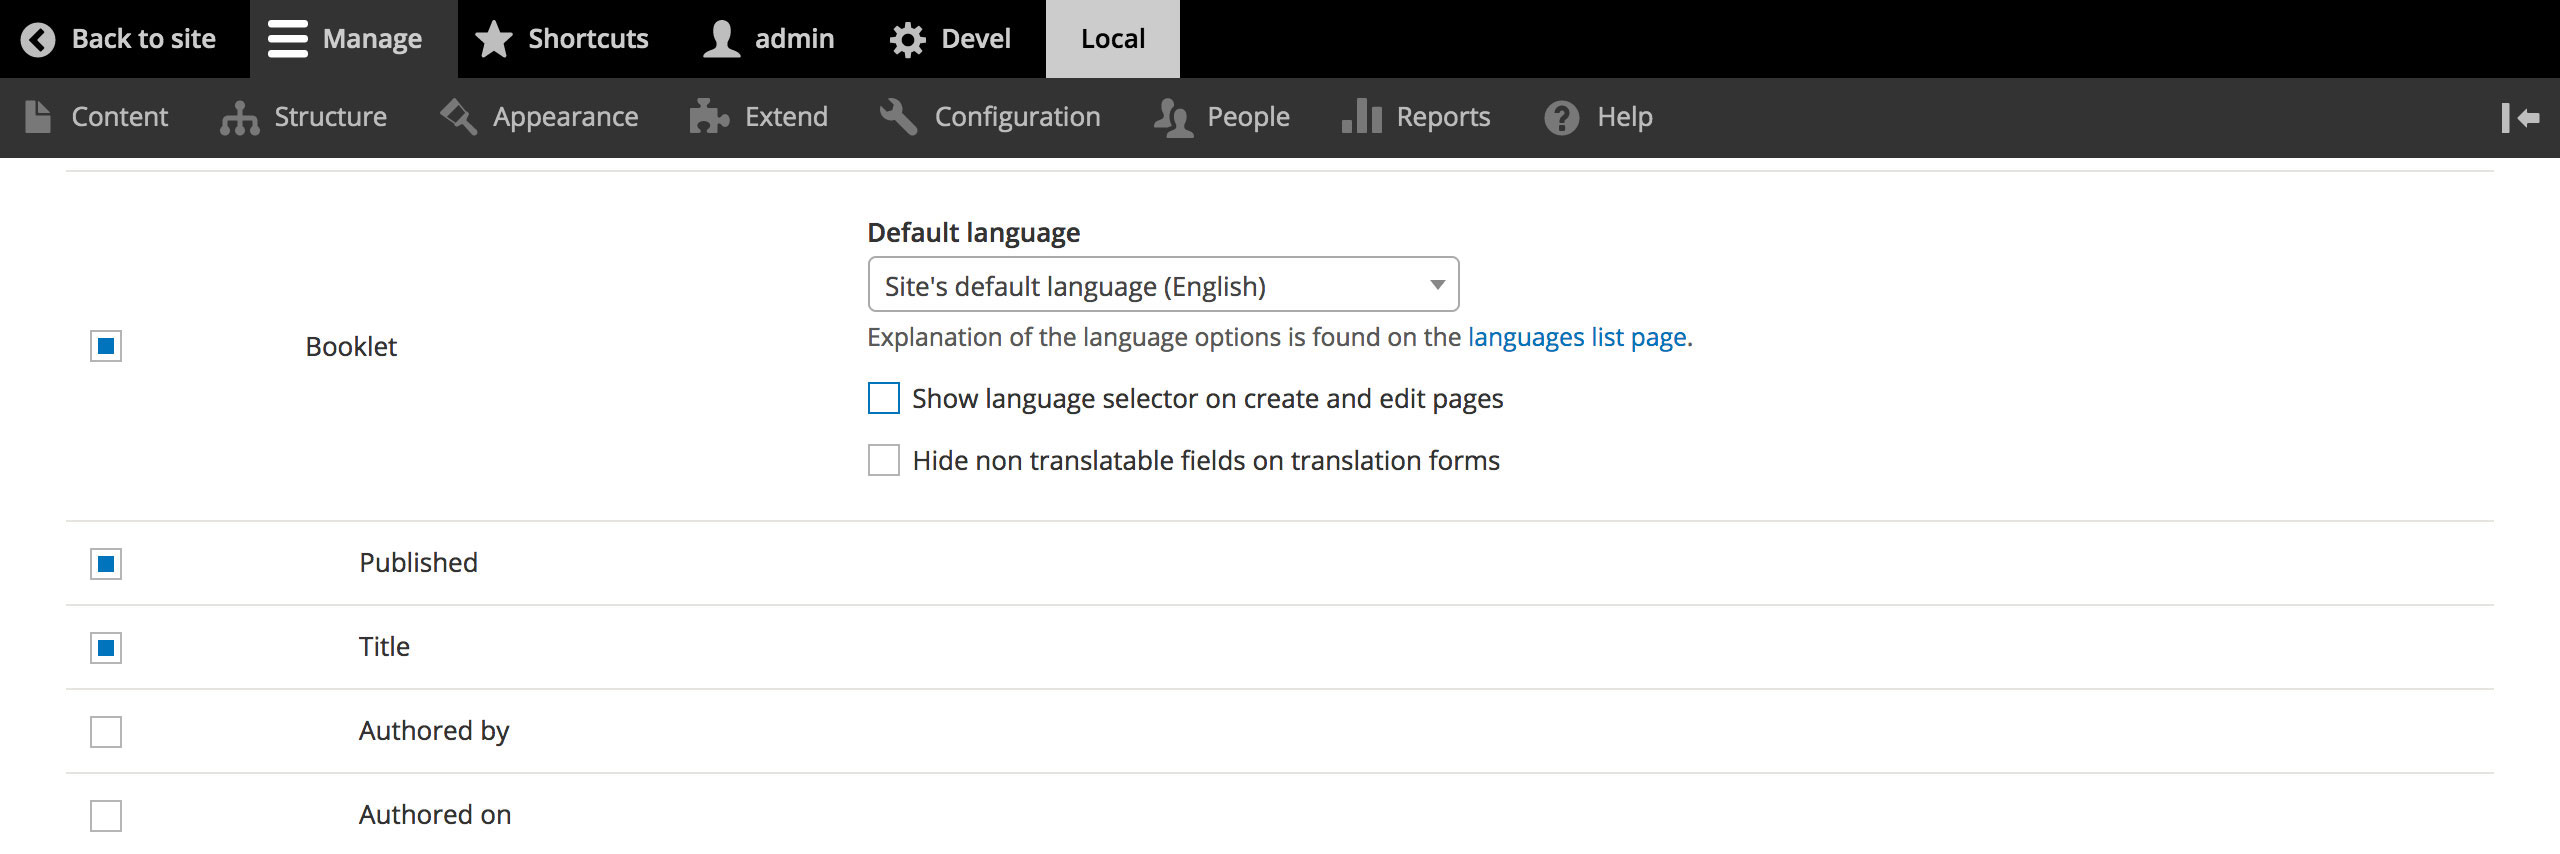
For each entity type that you enable translation for, you can then select the bundles and the fields on each bundle that you wish to translate. You can also choose whether to hide non-translatable fields for bundle, the default language, and whether or not you want to show a language selector on create and edit pages. NOTE: If using the Metatags or Paragraphs module, do not hide non-translatable fields. Metatags will throw a fatal error and Paragraphs will not be able to be accessed for translation if you do.
Once translation is enabled for an entity bundle, a new Translation operation will become available for editors in the operations dropdown and local tasks tabs of the entity bundle.
Configuration translation can be accessed by either the operations dropdown for an entity’s configuration or by going to Configuration > Configuration Translation.
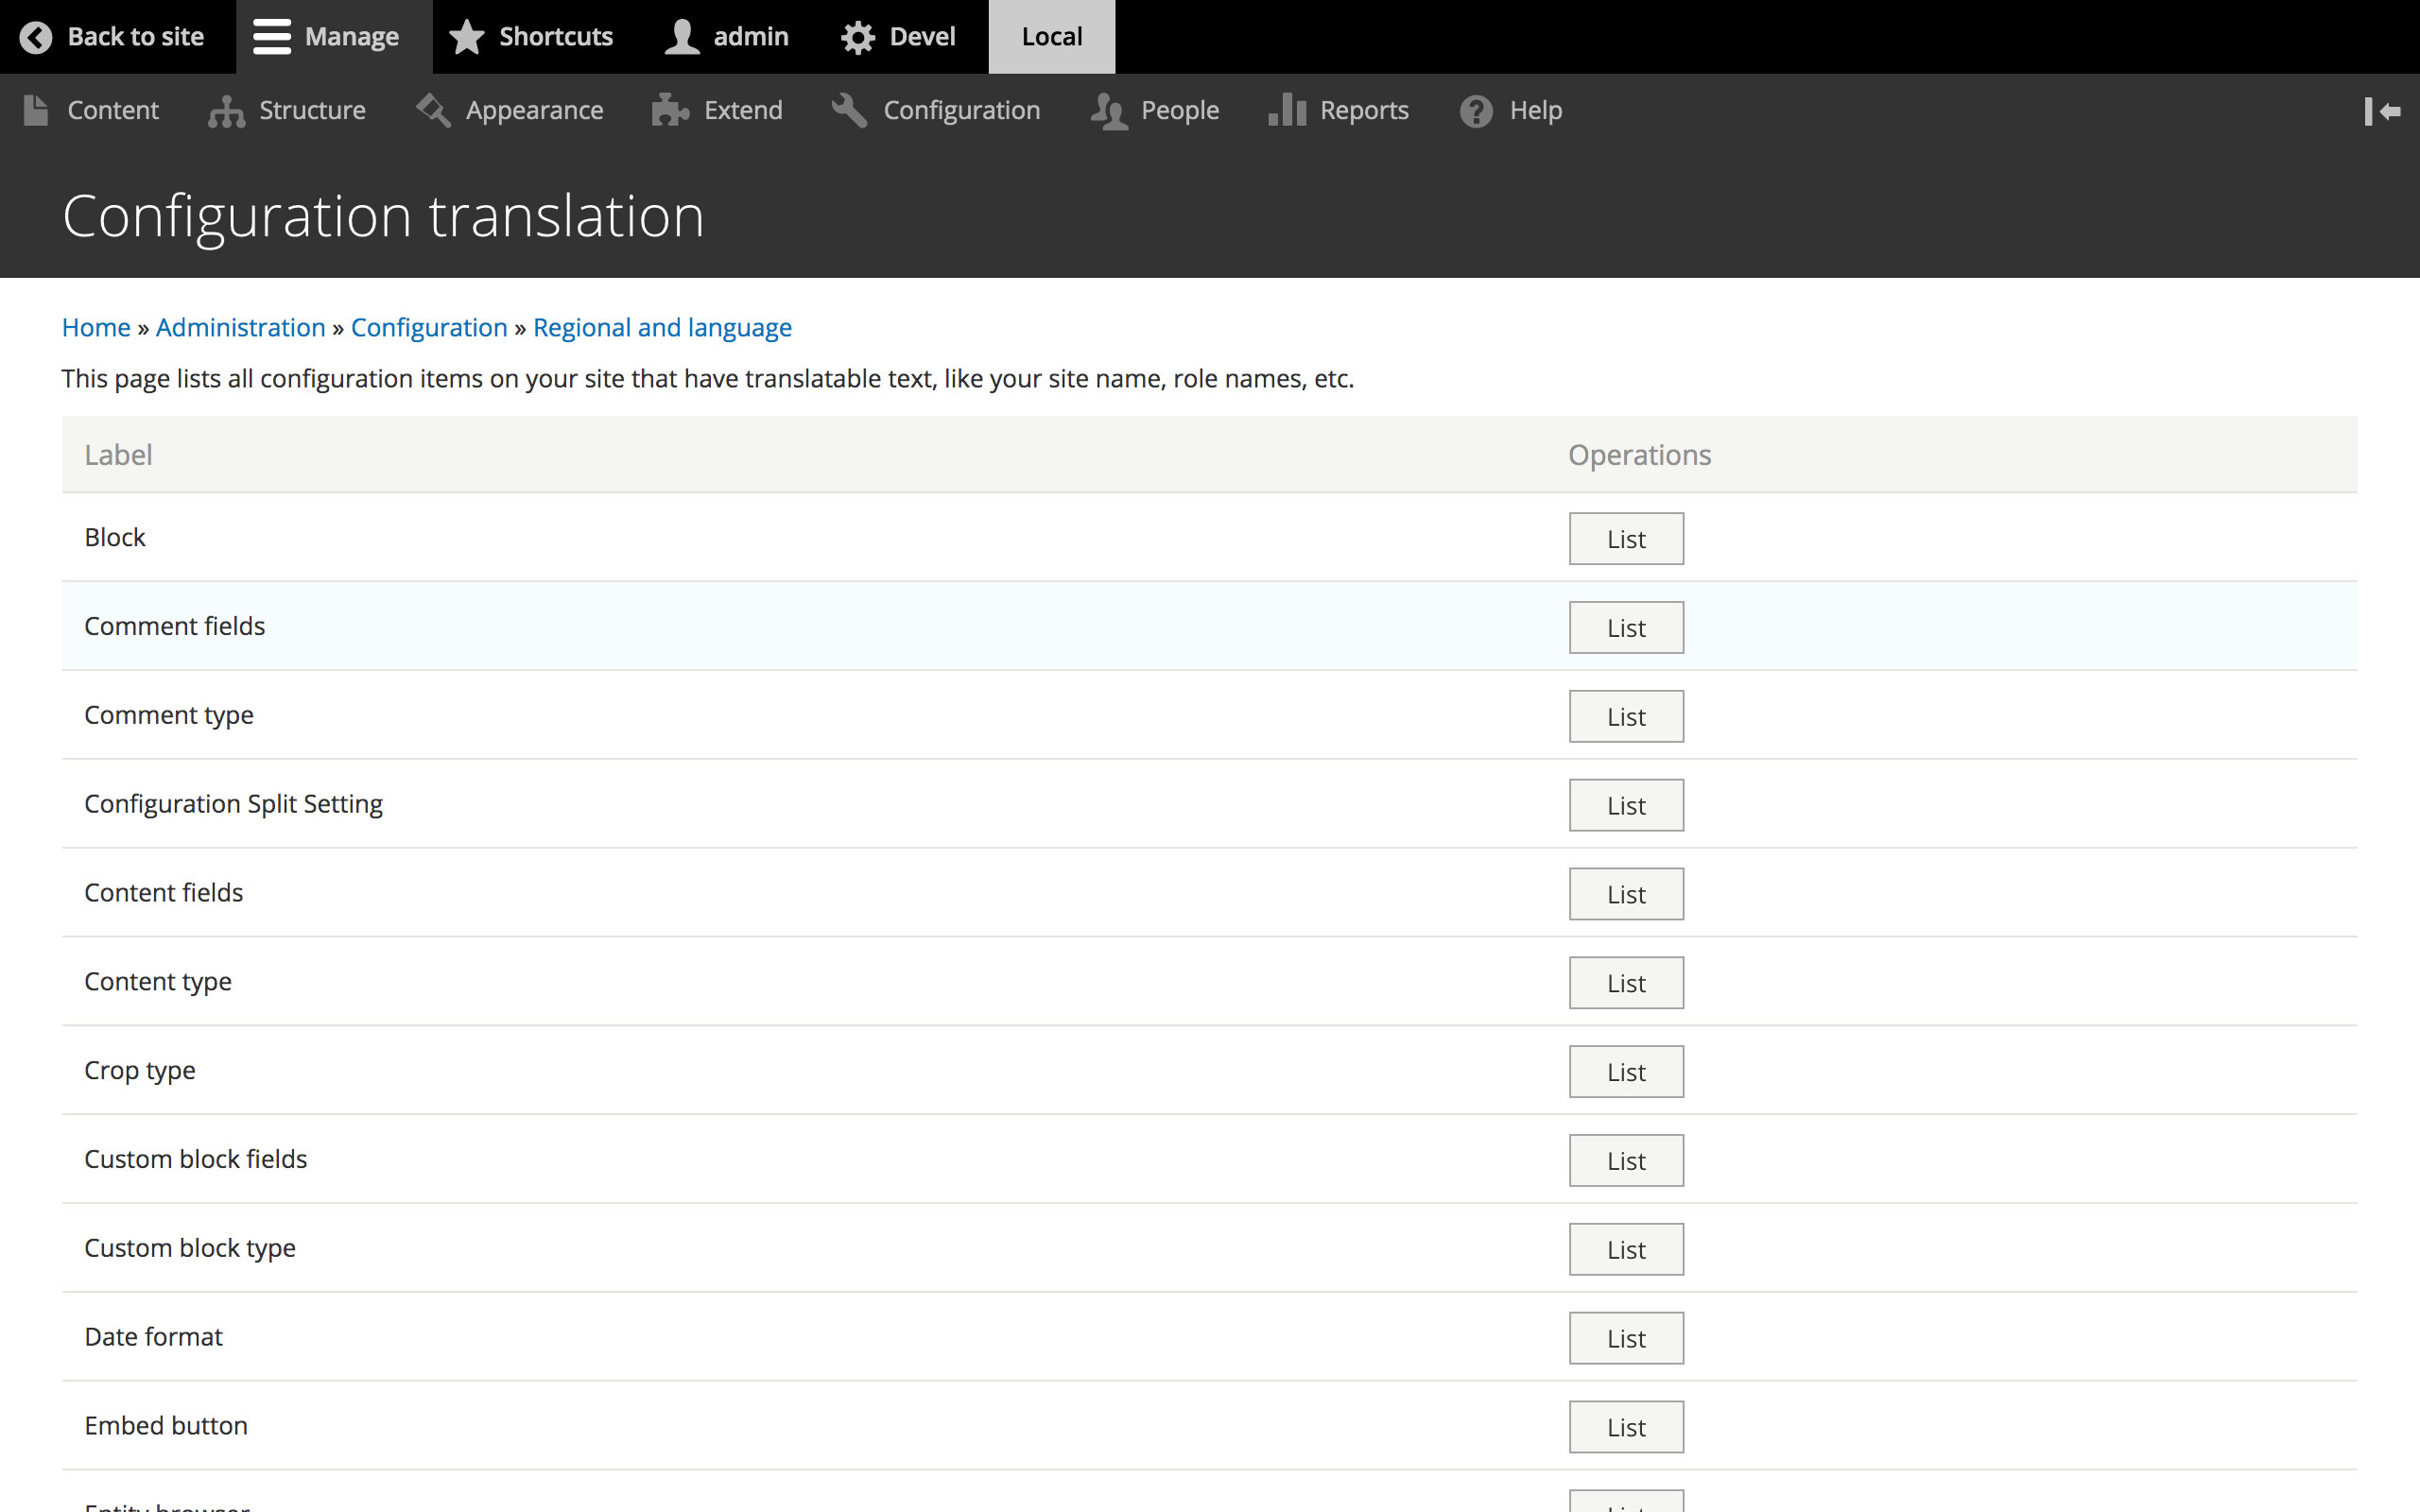
Configuration translation can be done for any entity, but translation for most entity configurations will not be seen by an end-user. For example, when translating a content type—only the content type name, description and the label of the title field are translatable. It may be beneficial to translate these if you have multilingual editors, but on most sites, an end-user will not see any of these.
Instead, you’ll want to translate the fields on the content type via the Manage fields interface to add translated field labels and select list options and things a user will actually see. This same method should be used for the configuration translation of any fielded entity.
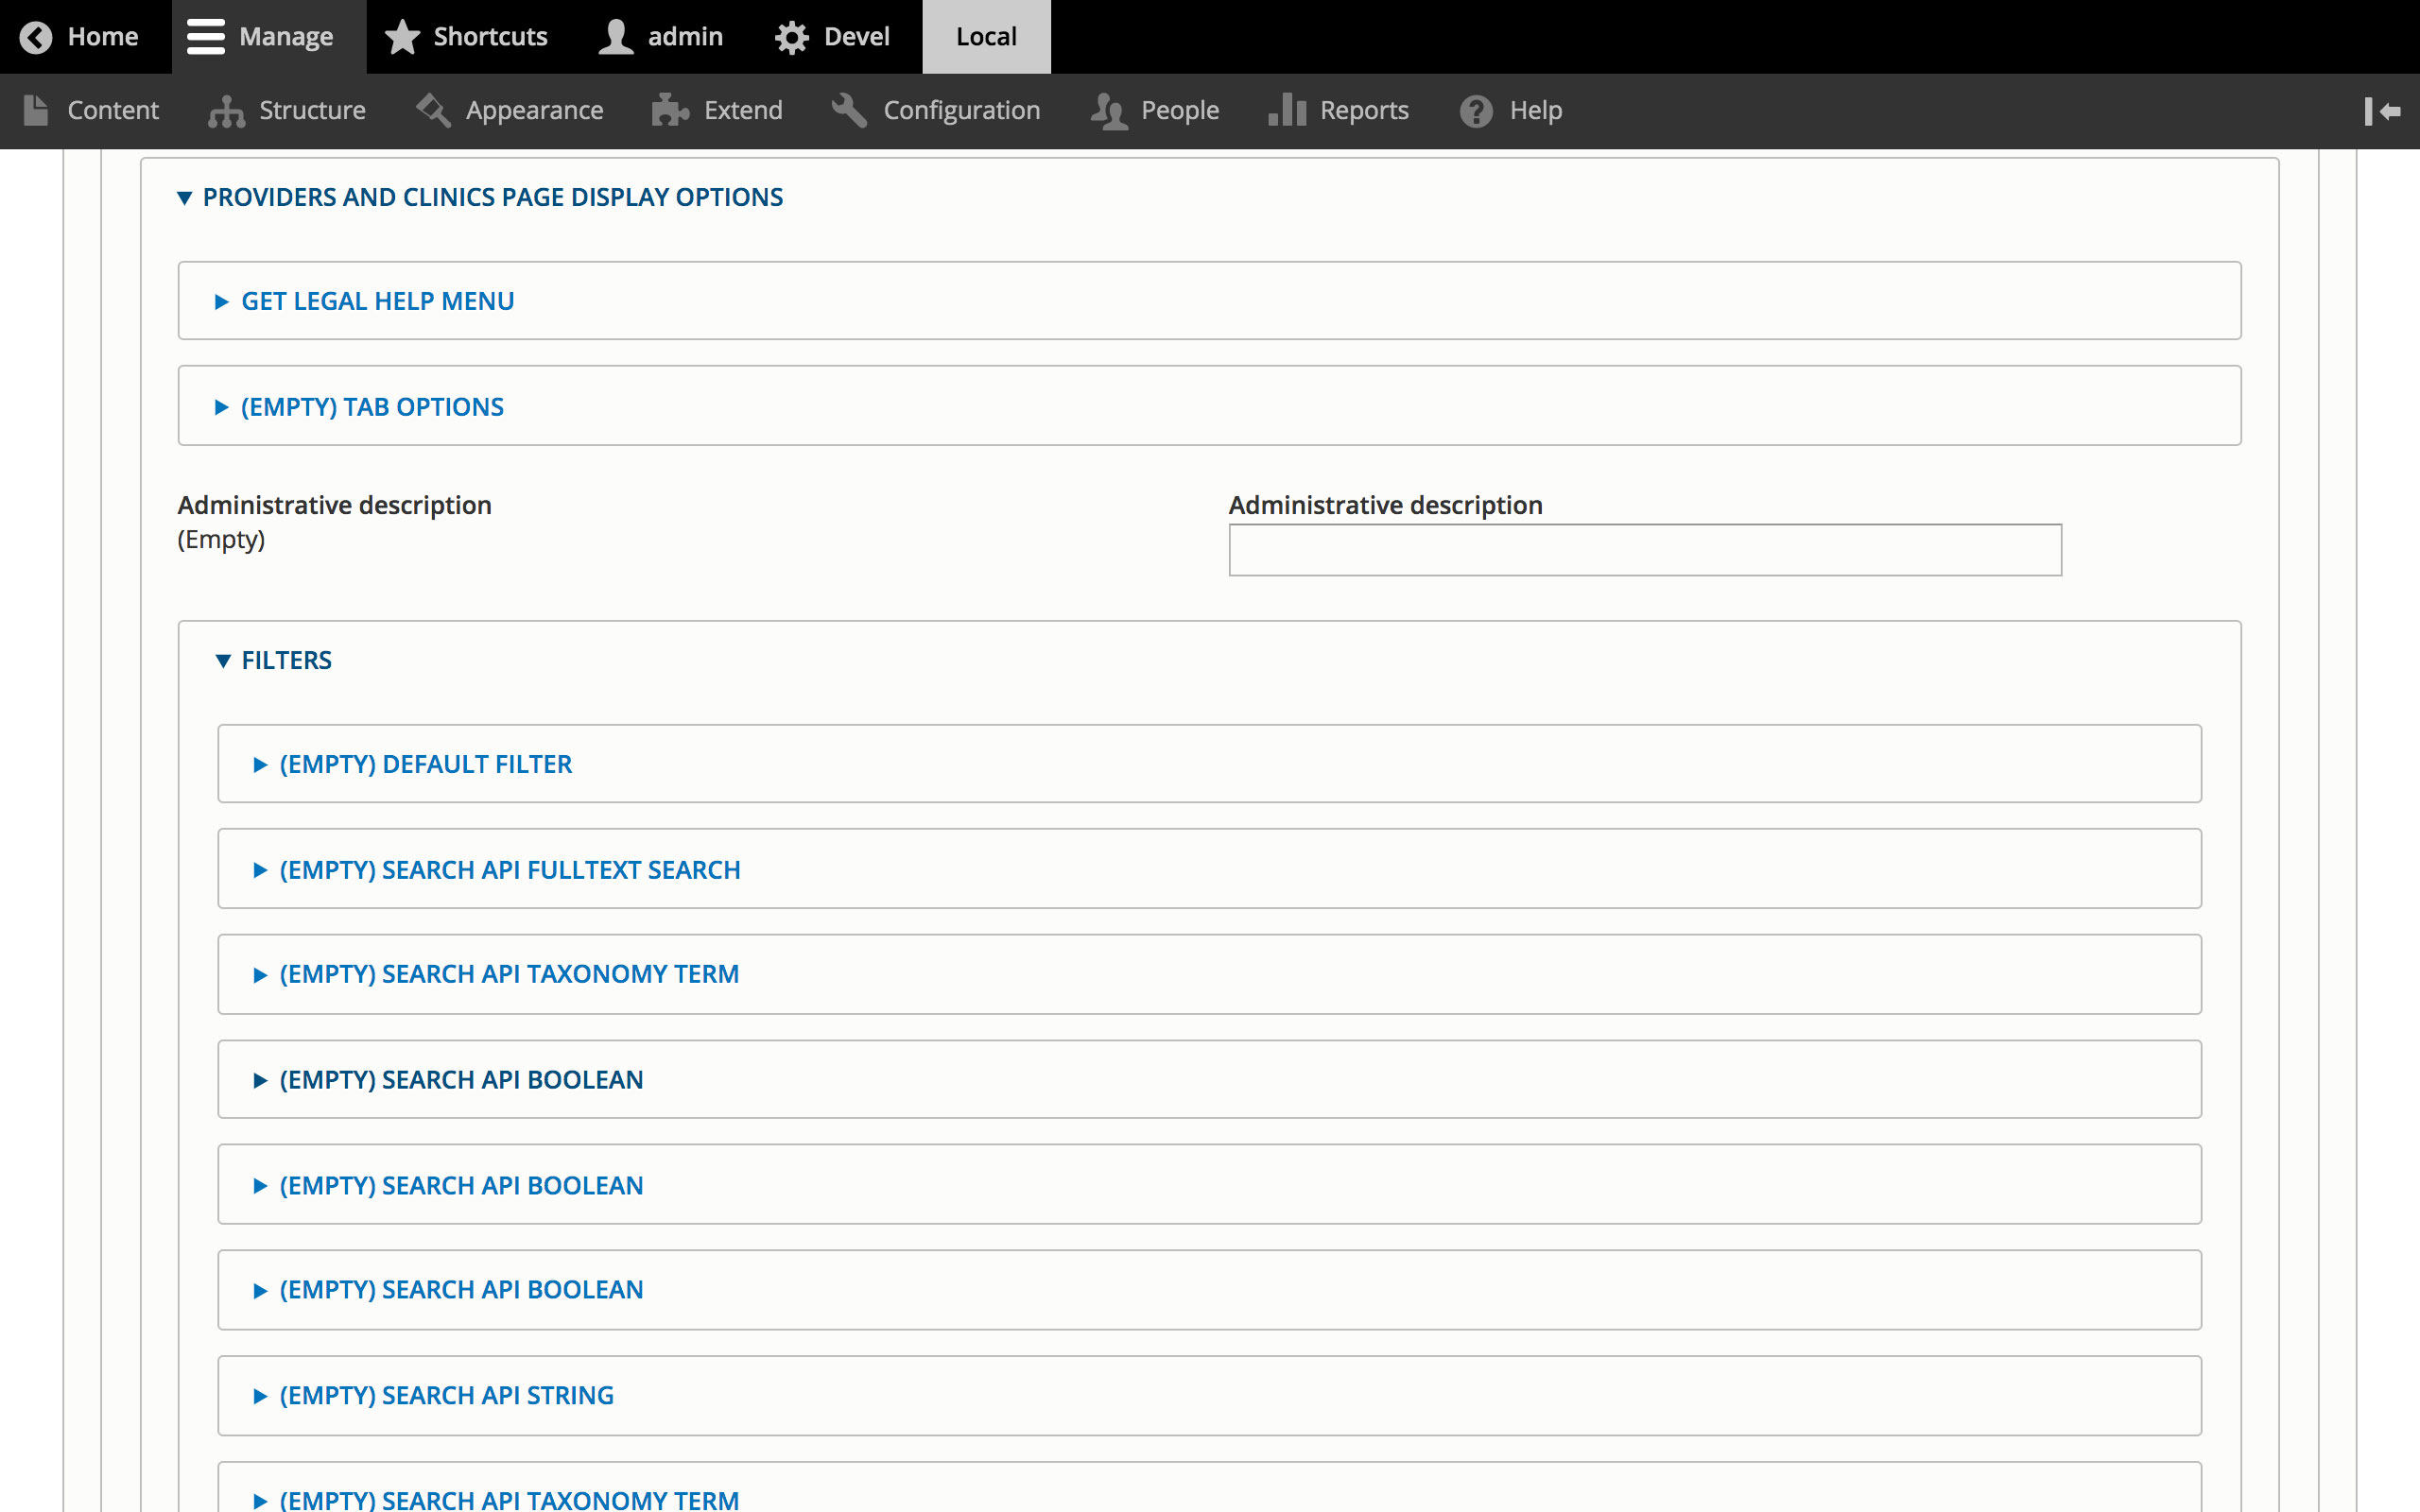
Views translation is perhaps the most common area of configuration translation and possibly the most unfamiliar to site builders not familiar with multilingual. While the configuration translation interface for fields is very similar to the regular editing of field configuration, Views is very different.
When translating a View, the entire View and all its displays are translated in a single page with nested form elements (think collapsed field groups), some of which are obscurely named. In order to translate something like a filter label for a view display you need to burrow down into the display, then the display options, click deeper into the filters, where you hopefully guess the correct one to translate and drill into it, then finally into the exposed option before you can translate the label.
Interface translation can be be reached by going to Configuration > User Interface Translation. Any text in the administration interface as well as any Twig strings and PHP strings coded as translatable can be translated from this UI.
Developers of a multilingual site should code all custom text strings using the {% trans %} tag in Twig or the t() wrapper in PHP. Once the strings are coded with the proper wrapper, you need to clear the site cache and visit a page that the translated text will appear on in order for the string to show up in interface translation when doing a String contains search.
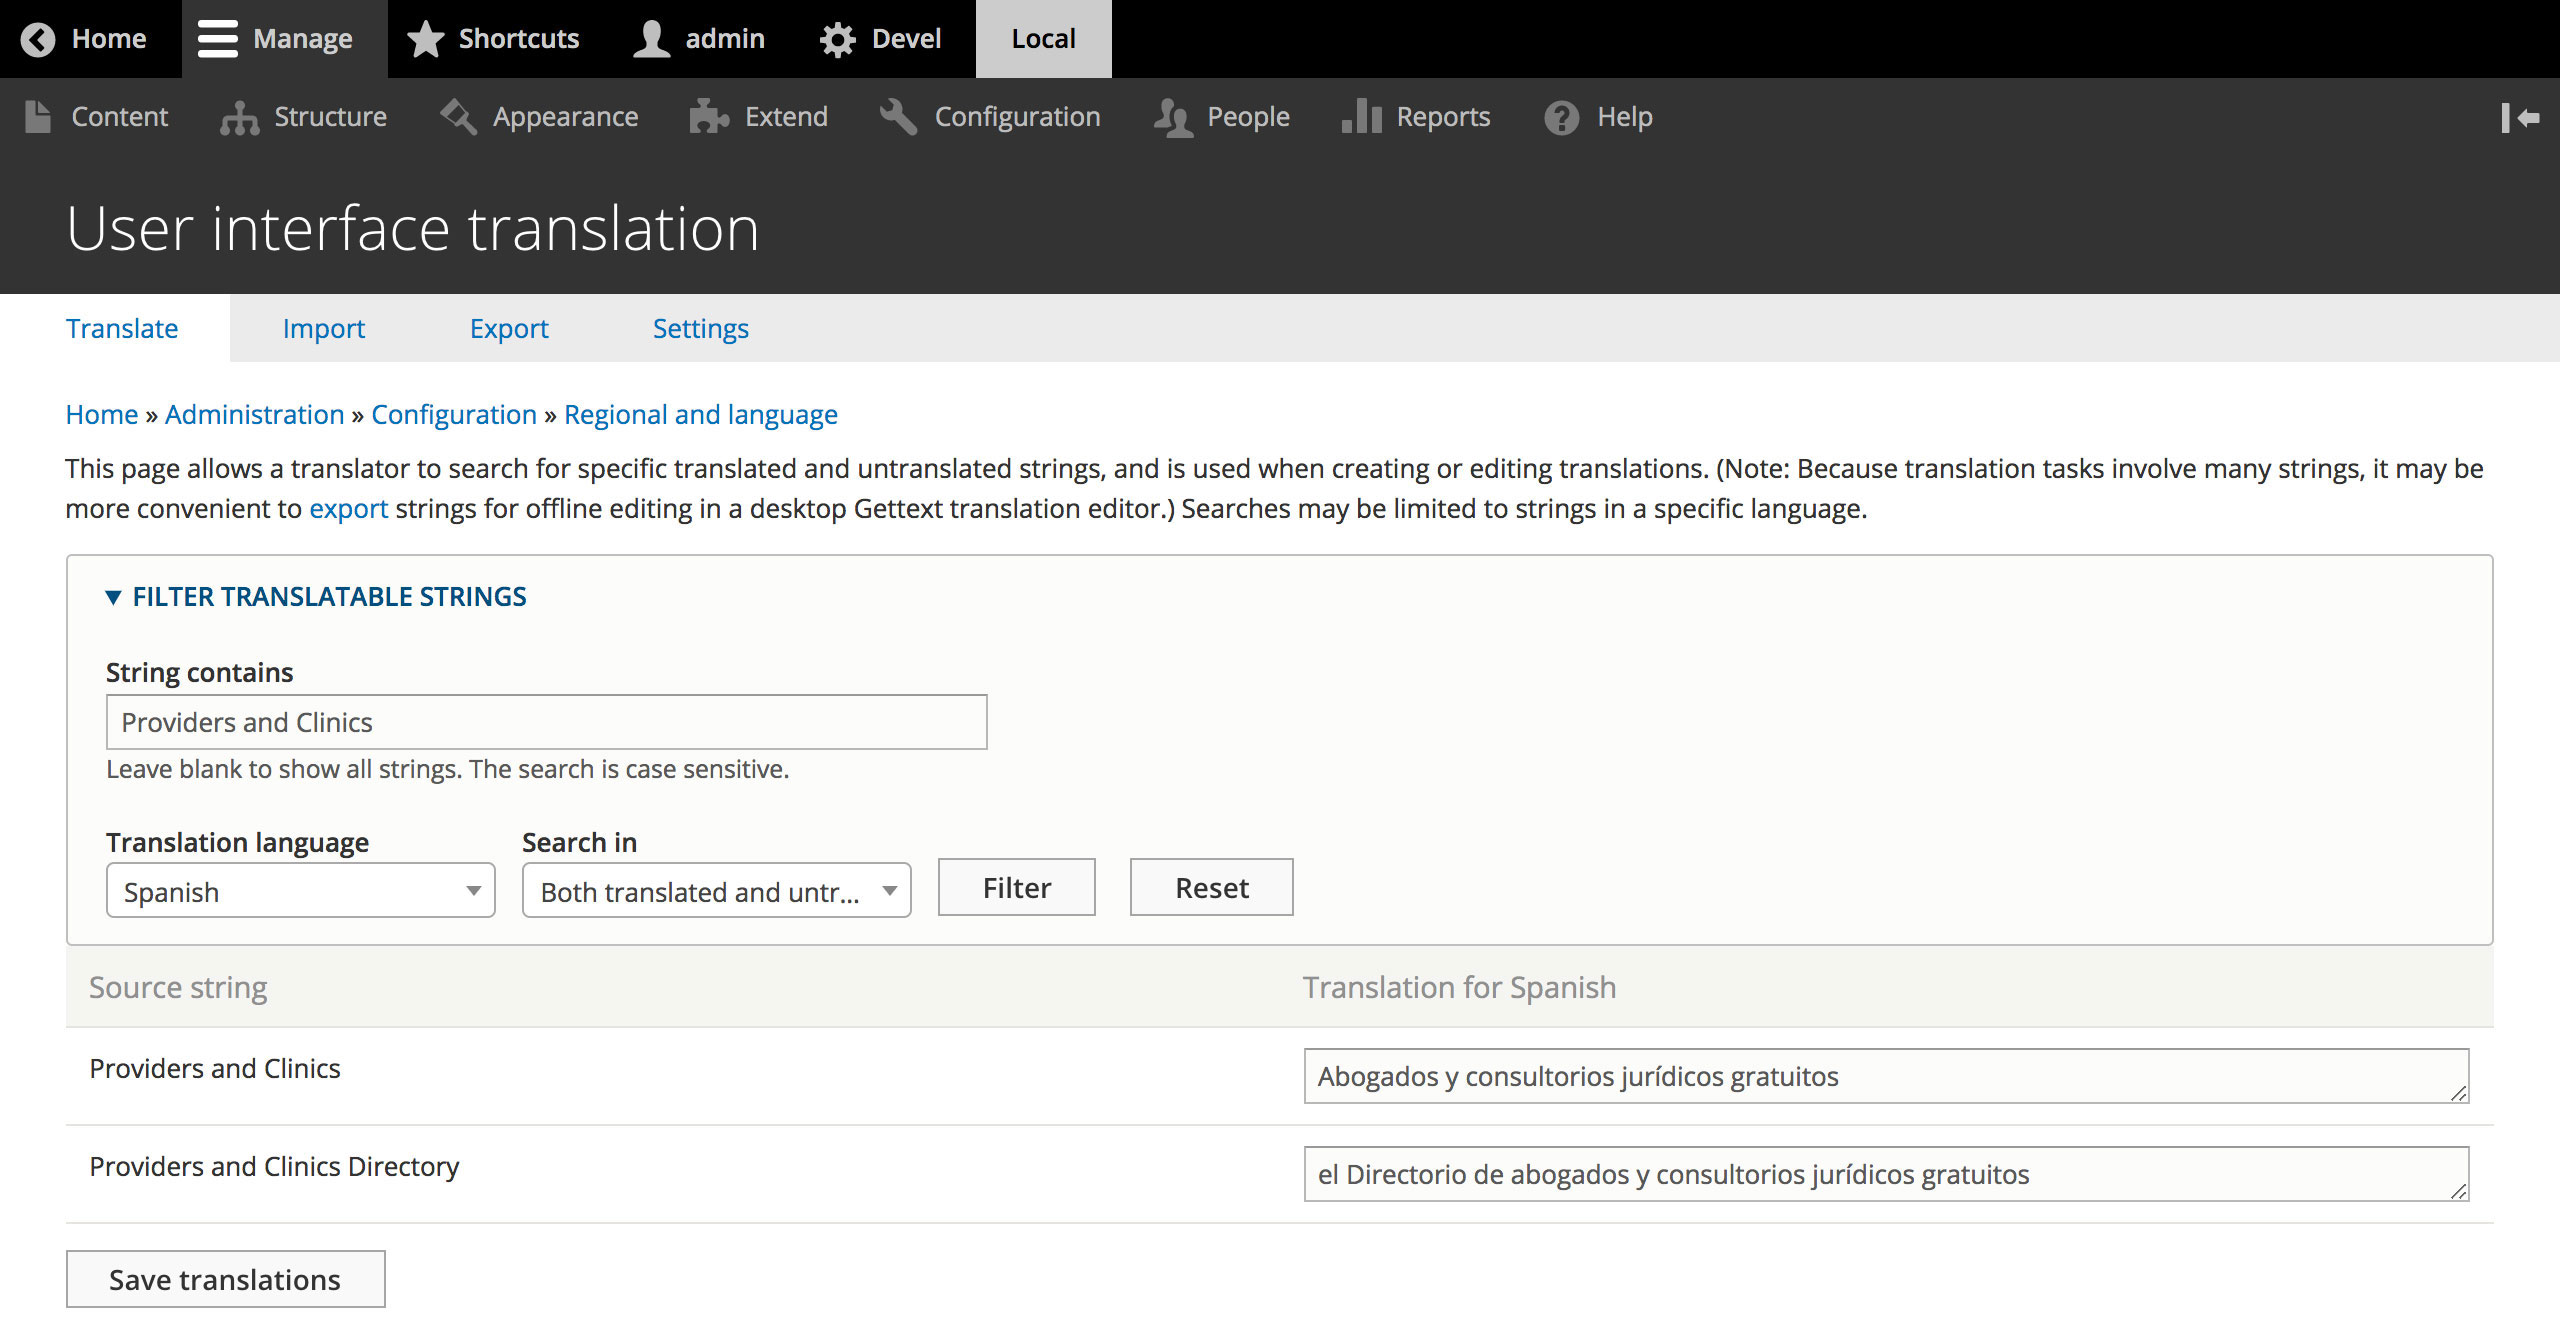
Once the text appears when searching the translation UI, simply select the language you with to translate into, click Filter and enter the translation. NOTE: Interface translations count as content so they can be done directly on a live site without having to go through the configuration management workflow.
You now know the basics of building a Drupal 8 multilingual site with core modules and no custom code. The methods discussed in this post will work for any out-of-the-box Drupal site, but what about sites with more complex data models?
The last post in this series, Mastering Drupal 8 Multilingual: Part 3 of 3, will cover advanced tips for multilingual front-end development, improving the editorial translation admin UI, and providing a seamless end-user experience.


Join the Discussion +